The DMM (Digital Multi Meter) is probably one of the most widely used troubleshooting tools used for today's electrical and electronic equipment. DMMs come in a variety of sizes and shapes ranging from fairly complex instruments to basic simple easy to use devices. DMMs measure a variety of electrical units with the basics being Electro Motive Force (Volts), Current (Amps) and Resistance (Ohms). More elaborate DMMs measure more advanced units. Our focus is going to be a basic DMM and how to apply it to home computer diagnostics. We are not going to cover the more complex "bench type" or "laboratory type" DMMs, however, if there are questions please ask.
Some Basic Hand Held DMMs
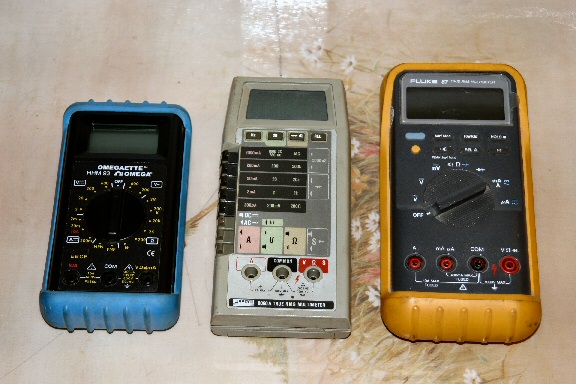
Pictured from left to right are an Omega Model Omegaette HHM 93, a Fluke Model 8060, and a Fluke Model 87. Before we actually take some measurements using a DMM we need to understand a few basic terms associated with DMMs as well as the cost factors involved. Looking at our DMMs in the picture they are arranged from least expensive to most expensive. The Omega HHM 93 is a typical $29.95 device. The two Fluke units are in the $400.00 price range. There are a few things that determine the price of a DMM.

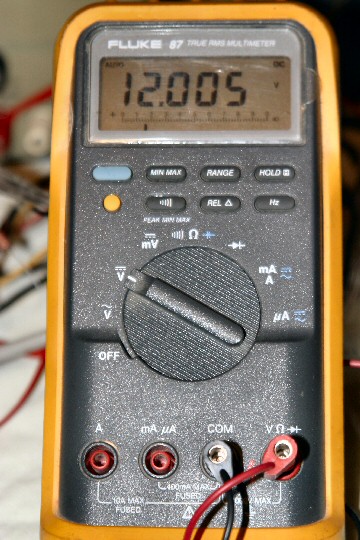
Note how our lower end DMM displays 12.00 Volts while the higher end DMM displays 12.005 Volts. The better DMM allows us to read 3 places to the right of the decimal while the lower end DMM affords only two. When purchasing a basic DMM for home computer applications and troubleshooting we need to consider things like Accuracy and Resolution. How good should our DMM be?
To have an effective and reliable measurement plane we need to consider the rated output accuracy of what we want to measure. Working with a home computer PSU (Power Supply Unit) the output voltages of 12.00, 5.00 and 3.30 volts all have an allowable tolerance of + / - 5.0%. A good meter should be four times greater in accuracy with ten times greater in accuracy preferred than what we are measuring. If we use a home computer PSU as an example we know the specifications for output call out + / - 5% meaning the 12 Volt output can be between 11.4 and 12.6 Volts. Therefore even the low end DMM we have, the Model HHM 93 is plenty adequate and accurate for measuring the voltages of home computer PSUs. Looking at the accuracy of the HHM 93 if we were to apply a standard absolute voltage of 12.000 Volts the acceptable measurement would be between 11.04 and 12.06 well exceeding our requirement to measure between 11.4 and 12.6 Volts.
Note: At this point, prior to doing any measurements a note about safety and good work habits is in order. The voltages we will be measuring will be low voltage DC and relatively harmless to human life. However the actual inner workings of today's home computer PSUs do contain potentially lethal voltages. Unless a person has a good understanding of the inner workings of a PSU DO NOT OPEN THE PSU ENCLOSURE! You will not only void the warranty but the potential is there to void your life!
A simple way to obtain voltage measurements is to find a point to measure from. We are familiar with the 4 pin Molex connector commonly connected to drives. Generally PSUs use a common color scheme. Yellow is 12 Volts (that includes pin striped yellow on PSUs having multi-rail 12 Volts), Red is 5 Volts and Orange is 3.3 Volts. Looking at a 4 pin connector we can easily measure a 12 and 5 volt rail. Lets look at some images:
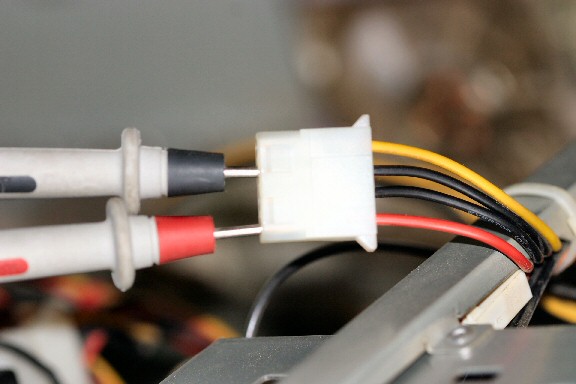
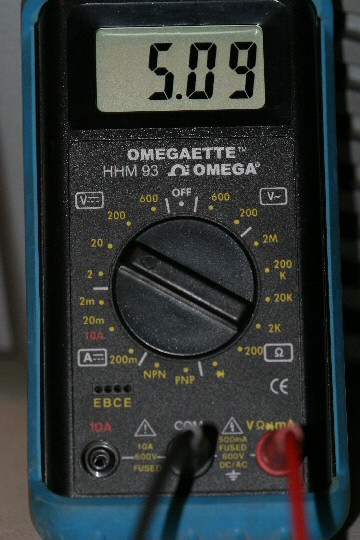
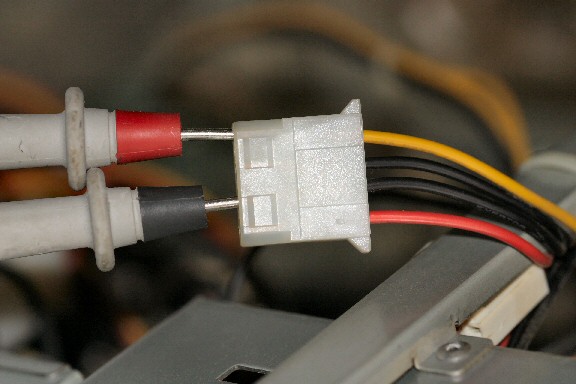
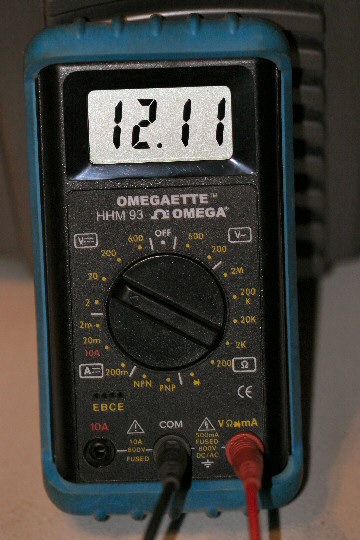
We can see at a glance the meter is set to measure DC Volts and set on the 20 Volt range. Our test leads are connected to the Com (Common) Black and V / Ω / mA input Red. We have used pretty standard test leads and we can see the measured voltages. Finding a convenient place to measure the 3.3 Volt bus can be a little tricky. Let's take a look at one of the options:
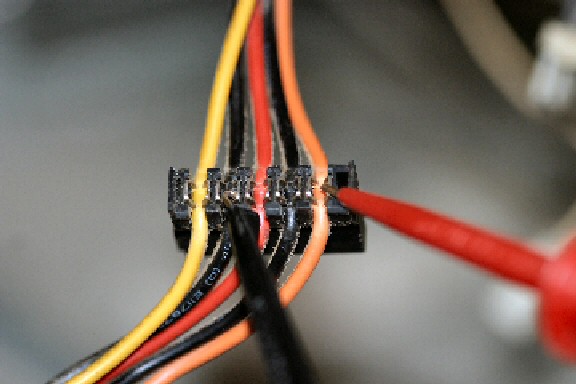
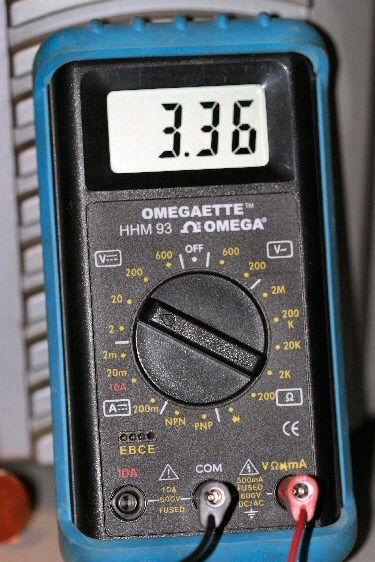
The connector shown in the picture is a SATA drive power connector. I simply removed the protective cap and connected to Orange (3.3 Volts) and Black (Common). When the SATA standard for a power connector was adopted it included 3.3 Volt power. Even though Hard Drives do not use it, it is a convenient place to capture the 3.3 Volt bus. Additionally for this measurement we used Mini Grabber leads. These are a slight deviation from the previously used Pin Plug leads.
Note: When measuring PSU Voltages on most home computers a conventional wire color scheme is used. Generally as we mentioned Yellow (or Yellow variations) are the 12 Volt bus(s), Red is the 5 Volt bus and Orange are the 3.3 Volt bus. This color scheme is not cast in stone and server or workstation PSUs may use different color schemes.
When measuring PSU voltages it is worth noting we have looked at a few simple points to measure from. We could also measure these voltages at the motherboard's main power connector. Typical 20 and 24 pin motherboard power connectors are labeled as such:

Measuring at the actual motherboard connector will afford only a slightly more accurate reading of the voltages. It can be a painstaking task using probes inserted carefully along the side of the actual wires at the connector. Unless the connector is easily accessible I don't advocate this method.
This guide is aimed more at using a DMM and providing some very basic information about DMMs and is not written as a home computer troubleshooting guide to isolate PSU problems. However a very basic scenario of what happens when a home computer power button is pressed can be found here. The link is: http://www.bearblain.com/the_psu_page_1.htm. Remember you do not need a high end DMM for basic troubleshooting. DMMs in a price range of $19 to $29 will do just fine for most basic applications. The DMM is likely the first piece of test equipment a home computer enthusiast should consider.
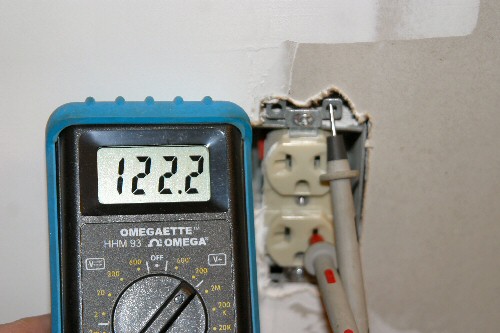
Let's take a look at a few standard 120 Volt AC wall outlets and measure the mains voltage. Again CAUTION is in order as we will be measuring 120 VAC which can be lethal. Only hold the meter probes by the insulated portions. The most common cause of electrical shock taking measurements of this type is when people accidentally touch the metal of the probes or the metal where the probes connect to the DMM. Exercise extreme caution and be careful!
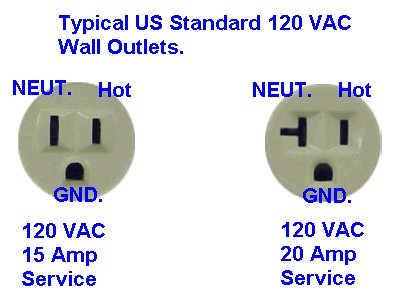
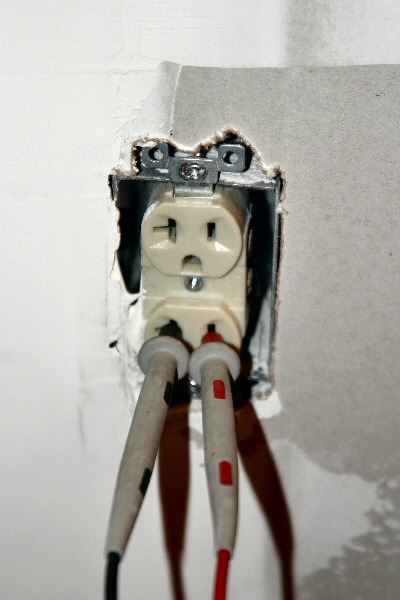
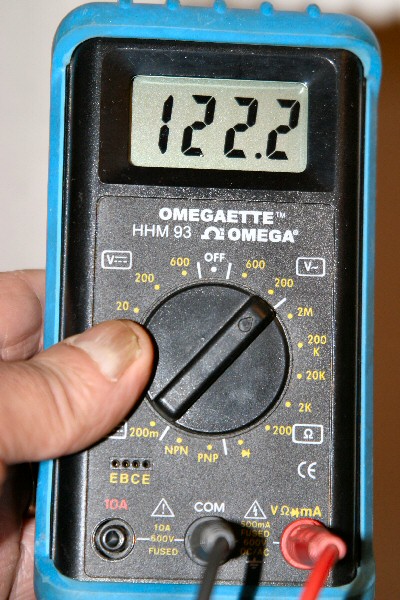
Our meter is set to measure AC Volts on the 200 Volt AC range. The Black (Common) probe is inserted into the neutral side of the outlet and the Red (Hot) probe is inserted into the hot side of the outlet. We can see the mains line voltage is about 122 VAC. Since this outlet is a new install lets make sure the Ground is correct. We will measure from the Hot to the metal outlet box.
We can see the metal outlet box is at Ground, we would also measure from the center Ground Lug of the outlet to be sure. Typically most AC devices that connect to a wall outlet will run fine when the mains voltage is between 110 and 125 VAC. Again, when taking measurements of this nature always place safety first! Periodically inspect your test leads for signs of fraying or damage. Never insert a probe while making contact with the metal.
Ron